Wednesday, May 14, 2014

A tweak here, a touch there

Once my art journals are about full, I look for things to add that will make it  more interesting.     Paints, rubber stamps (both handcarved and commercial ones) quotes, scribbles?  Any and all of the above.    Here are some pages that have been tweaked.


This first spread just continued the colors to opposite page and using a new stencil I just cut.     
Adding a small image cut from a magazine and a quote from something else, add a bit of humor to a page devoted to facial structure.
 You have seen this page before, but now it has been tweaked with the little handcut rubber stamps, some dodts of distress stains, some washi tapes and a fish glued on finish it off.
 This very simple spread has only had commercial rubber stamps added.  
 Here's one of my cowboys with some barbed wire border drawn on, some hand cut rubber stamps, a quote and a little cut out from and old book added. Now the page deserves more than a quick glance.
I kept this one simple, it has our great grandfather's picture with the rubber stamps I cut of myself and my brother.     There is a little poem which I edited from an old Book of Knowledge. (it had been written for two brothers)

"I love you well, my brother,
And you are fond of me,
Let us be kind to one another,
as siblings ought to be.
You shall learn to play with me,
and learn to use my toys:
And then I think that we shall be
Two happy little children"

sorryit no longer rhymes. 


 The owl pages had a few tweaks.
 Painting around little sketches brings out the shapes.
 This quote was from one of the Ted Talks I watched this week.   

Another corboy?  Another barbed wire fence, and a girlfriend for him. 
 A little blue was added.    Now for just the right quote.      Hmmmm....
 Washi tape and handcut rubber stamps.  


You have probably seen enough now to let you know that tweaking can go on and on.   Maybe art journals are never really done.    I've stuffed things into filled ones.     Sometimes you come across a quote or an image that you wish you'd had when working on a page in another journal.    No use letting it go to waste - tuck it in, glue it on, or find a way to use it where it works best.       These are really only for our own amusement and growth artistically.    

If you have not made one, I urge you to do it, do it now.     Start with no expectations, just let it grow and change.   You can always rip out a page, or glue something else in.          


Children's faces

I've been trying to capture a little girl's face from a photo.   I"m having a very hard time, but I'll show you what it looks like right now.   Shelooks so sad.    I had to really turn down the corners of her mouth and darken around her eyes to give her this forlorn look.    It's actually what I was trying to capture here.    


At the senior center on Monday, John Carruthers showed us how he learned to paint faces.     Here he is with  some samples.


His process is so different than my own, but I took his workshop to see if there was something he does that would apply to what I'm doing.     

He first gave us a picture to trace, and then we ( 5 of us) marked our watercolor paper with only the eyes traced, the bottom of the nose, and a little line to mark the top of the head, the hairline, the sides of the face and the chinline.  Oh yes, and the mouth.  Then we measured to  find then other placements.     Using only a brown acrylic paint and water, we were to paint in the eyes and the lower nose with our darkest value, then tone it down to do the middle values - the shadows.    then he had us  mix a bright pink with while acrylic and apply to the face, covering the work we had already done.    Then he added some ochre, a read, and a yellow to our palettes and told us to work fast to paint as much as we could.       Here is my pic.   So now you have a happy child's face.    Those little missing teeth and small eyes were really challenging.      This is not how it looked when I finished that day.  Since then I have added touches tith colored pencils to finish her off.


It was fun working in our little group.  Some of the other artists in the room kind of kept their eyes on us to see what would be asked of us.   I think they may jsut brave it out and join us next time, as John is so patient and nurturing a teacher, they will soon get caught up in the exercise and forget they are out of their comfort zone.

Thursday, May 8, 2014

Let's poke around in my little artsy garden

It's kind of grey and muggy today.     But, I thought I'd  see what's blooming.   

 One of my artsy friends gave me an iris last year which I planted in a planter by the back fence.     Here it is blooming for the first time.  I'm sure each year it will get better and better.    


This is a red amaryllis that's about done blooming. 


This little iris is one that blooms all summer.   I started a whole bunch of these from seeds so we have them in the front yard, in a pot, and wherever there's room for another , I just dig up a seedling and move it in.      I love these as they are so cheery and remind me of the one we had alongside our house when I grew up.  This is what I would take to the teachers in the morning.  


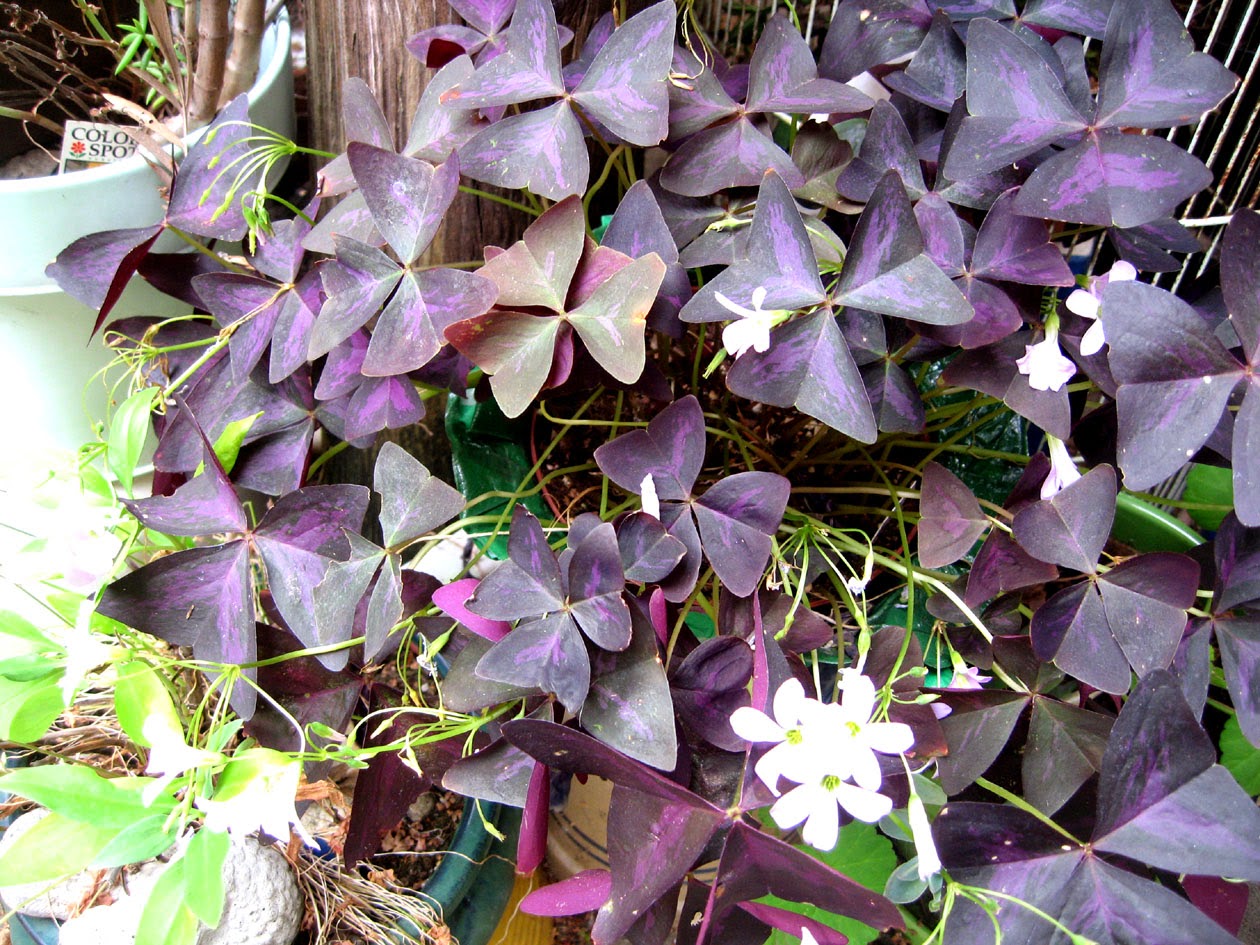
There is something so special about purple leaves mixed in with the other garden greenery, and the while blooms are delicate and sweet.    Some form of oxallis.


 Nasturtiums volunteered again this year mixixng it up with the Mexican sage.  
 Here is more of the Mexican sage with the pink oxallis.
 Honestly, there is a meter here.    They read things electronically now so no one had to paw through the foliage.
 This little sweet corner is waiting for warmer days to add the water to the bowl.    
 These glorious red geraniums are from cuttings taken last year from a sicko plant.  These offsprings are off to a good start.    
 The top of an old bookcase holds some of my outdoor treasures.    
and of course, who else is in the garden?     Girls are heading back upstairs for a treat.      

Thanks for stopping by.    

Tuesday, May 6, 2014

Art Journals


Here are some of the new pages I finished in one of the art journals in the last few days. .  

The hen face is a rubber stamp I carved yesterday at the senior center while chatting with friends.   It helps to carve there because it forces me to look up from such close up work, and it gives my eyes a little break.
 This is a quickie portrait based on a face I traced from a Rennaisance
painting.   
 Another self portrait done in pencil and then cut into rubber stamp.  
Wouldn't I love it if this was a self portrait?   LOL   Nope, it's just a drawing in colored pencil of a  generic face. I was more interested in layering the colors in background, than the face itself.   


 This is the new Mixed Media group journal.   In it, I'm recording who attends each meeting and what the project is.    Also, I'm acturally doing the projects in the journal itself, or attaching it later.    So far, everything is in there, including the directions for each project.

I used one of my hand cut stencils for the face, over a beautiful cotton batik fabric.
 This is yet another journal, one I started this week, to try out new things and to record the directions, since I have such a hard time trying to remember how the heck I did something later on when I want to do it again.

This page was done witha paint soaked string flopped down and pressed with opposite page when journal closed.      Then the string was removed to reveal an abstract line in which to doodle.     Kind of a fun little technique.     You can see the darker pink/fuschia string lines which is the paint.   
This page was done by layering acrylic paints dragged over a collaged background - with a credit card.     I do this a lot, it's my favorite way to spread paint.       Then I used an advertisement cut out ofa man, three times, with one overlapping.     The red scribbles are just for fun.

I have not covered this one yet.      The top one has a cover I took from wall of studio.  I had painted a face on a piece of tapestry fabric found at a thift store while on an outing with art pals.     She is actually a 3/4 figure, so the bottom part is folded back under and glued at outer edges to create a nice pocket for my drawing pencils and smudger.  Also a stray post card or two seem to find their way into this pocket.   LOL


 This page was painted as I watched a video on flower painting in acrylics.     Colors a bit out of my comfort zone.    Fun exercise.
This is a drawing of a self portrait by Theophilus Brown.     He did quite a few self portraits and I'll probably draw more of them for practice.   I love this one best so it was my first choice.  


 There is no end to what can be done on a journal page.    This little sketch of people waiting at Kaiser was done early on in this journal, but I jsut decided to doodle a border.    Going back to do little changes happens all the time, expecially if I have a new pen, or technique to add.    
Here is more doodling on an earlier page.     It is so much more lively now. l  Someday it may have a face.  LOL  

Saturday, May 3, 2014

Revisiting an old stencil project

Years ago I went to Art and Soul in Asilomar with some art friends, including Roberta, Sally, Nancy, Rosemary and Char.  Did I miss anyone?     The first workshop I attended was the one by Albie Smith.

She led off the day by showing some previosly made art journals to give us inspiration.     It was a huge class and we were jammed close together.    We started by making background papers, one after another.  I chose my color scheme based loosely on one of her samples that attracted me, and was out of my comfort zone.   Albie had supplied the materials, so that made it easy to proceed with everyone having the same papers and paints available.   I think it was paste paints we used for backgrounds.


We had to lay the papers out all over the floor in this big room so they could dry and then we could work on the backs of papers.       After both sides were painted we had access to a wonderful stash of stencils.    Working with colored gessos, we pounced our stencils, washed them off in the sink, and went to find another one.       She encourages us to over stencil.   She also had some really good stamps we could use ( like the big leaves shown here).      It was a madhouse and I felt very pressured to get things done so we would move on the folding and making the book and doing the binding.      


When I got home I added my own cut stencils and some of my friend Jackie's that we traded back and forth.     She made a collection of goddess figures. She cut ;them in small, medium and large sizes.    I made the elephants and the religious figures in assorted sizes..

Since stencils are so big on the art scene right now, I thought I'd show this as a reminder that it's nothing new - it is just evolving by clever marketing and involving the internet art groups.  They have caught on to making it more interesting by offering so many ways to use them and so many different looks can be produced using the same stencil.   I'm glad they are back and HOT!    I like using them.     Now that I look back at this handmade book,  it makes me want to create another one some way, without doing the binding.   The stitching and binding look pretty good, but I found the painting and stenciling the most fun.     I stayed with a limited palette and like the sort of batik like jungle look.
Not all of the pages were so busy, I used the busier papers for the covering for each signature in the journal.  There were four signatures consisting of three folded over sheets of painted paper inside each one.   I forget the terms for the structural details.     We had to work so fast to get this all done in one day, I didn't really learn what I was doing, I just did it in a rush.     That was a lot of work, but the results were awesome.  To see everyone's books out on the table at the end and to see how different each one was - such a good experience.    


Some of these photos were taken at the workshop.   I understand Albie is not teaching right now.    Check her blog to see what she is up to now.    Soon as I got home I ordered colored gessos from her source and also a bunch of stencils.     I was so glad she shared the supply information so we could find them.


Recent work

Here are some recent pieces in my art journal.   


This is another cowboy from an internet photo.  I thought the angle would be interesting to draw.  I'v had the photo for years, and finally got around to sketching him.    I did this one at the senior center art group last week.
 This is supposed to be Lady Edith from Downton Abbey.   Well, all I can say is it looks better in the journal.   Now that I see it onscreen I can see where I went wrong.    Guess I should get out my smooth white eraser that works so well on errors in the journal.    Hmmm...
 This sweet young woman was done using gesso, black paint, and Portfolio Oil Pastels.      They blend well with the gesso.    I was trying for a very simple look, with  few details.    
This was done on the opposite page.  I worked on them at the same time with the same materials.     This was a fun exercise.